All You Need To Know About Electric Water Heaters

Heat Pump Water Heaters in Cold Climates: Pros and Cons

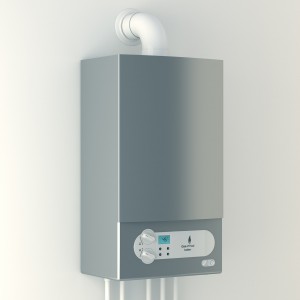
We chose a heat pump water heater for our new house, and as I’ve recently discussed here, there are a lot of reasons why you might be doing the same. Using an air-source heat pump, heat pump water heaters (HPWHs) extract heat out of the air where they are located to heat the water

That means that a HPWH cools the space where it is located. That’s a good thing in the summer—it doubles as air conditioning—but in the winter it’s not so helpful. That’s especially the case in a cold climate in a house without a standard heating system.

Cooling the space where they are located

In a typical New house that has a furnace or boiler in the basement producing a lot of waste heat, a heat pump water heater can use some of that waste heat and it’s not really very noticeable—the less efficient the heating system the less noticeable is the effect of the HPWH

But we don’t have a heating system in our basement. As a result, our HPWH cools the space. With the cold weather we’ve had (as I write this it’s about –2°F) and our basement has stayed pretty cool: typically 50°F–54°F, though with the exceptionally cold weather we had a few weeks ago during a time of heavier hot water usage, the temperature dropped as low as 47°F. Our basement temperature would probably be considerably lower if my wife and I used a lot of hot water, but we’re pretty frugal.

In cooling the space where it is located, a HPWH makes the heating system work harder. In our house the heating system is a single mini-split air-source heat pump wall-mounted unit on a first-floor wall. That system delivers heat to the basement through the uninsulated floor and through the basement door, which we usually leave closed.

Your Water Heater Loves to Care for Your Family

Hot water—it’s one of those things you don’t think about much. But when it’s gone, it’s all you think about! Don’t stress over something that you can’t fix.

What’s Wrong with Your Water Heater?

Is your system not working like it should be? If your water heater isn’t doing its job, there’s a good chance something is wrong with it.

Here are the most common problems people have with their water heaters:

Not enough hot water- Pure and simple. If your water heater isn’t meeting your needs, then it’s time to call in the professionals.

Leaks- Don’t pay for hot water you’re not enjoying! Our plumbers will locate any leaks and properly seal them.

Unpleasant odors- This can indicate your system is rusting or decaying from the inside. Have your water heater repaired by a professional before it becomes unsalvageable.

Unusual noises- Bangs and rattles can mean there’s sediment buildup in your system, which can severely damage it. Call us to get your system working and sounding as it should.

Discolored water- Your water should always be crystal clear. Discolored water is a sign of rust in your pipes or water heater. If your water is an unusual color, this warrants professional attention.

When It’s Time to Part Ways with Your Water Heater

Water heater repair can sometimes be cost-prohibitive. You’ll pay for the necessary repairs only to face another problem shortly thereafter.

You can avoid this scenario by opting for water heater replacement. If your water heater is more than 10 years old, it’s probably on its last legs. When we examine your system, our plumbers will tell you the condition of your water heater and what we recommend

Water Heaters

What Should I Do If My Water Heater Is Leaking?

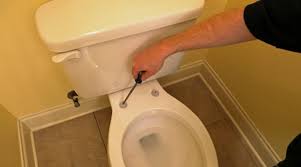
Is your water heater leaking? Here’s what you need to do: First, find the location of the leak. This will be helpful for you and your service technician. Turn off the power supply by switching the water heater circuit breaker to “off” for an electric water heater or by turning the dial to “off”

Hot water is one of those things everyone takes for granted in our modern society. A hot shower on a cold winter evening is relaxing. Hot water washes away dirt from laundry and grease from pans. And hot water comes in handy as an emergency defroster.

Most homeowners in Champaign are accustomed to reserving a corner of their basement or utility closet to a huge water heater tank. Cold water enters the tank, gets heated to a certain temperature, and is either used or slowly cools down. If it is not used, it needs to be reheated.

Energy Usage Drops

Regardless if you heat your water with natural gas, electricity, propane, or some other fuel, tankless water heaters use less energy. Instead of heating water only to let it cool down when you’re not using it, a tankless water heater operates on demand. When you request hot water in the shower, in the kitchen, or in the laundry, the tankless water heater prepares just the water you need and no more.

One Less Thing to Juggle

When hot water is limited to how much your water heater tank can hold, you may find yourself juggling when each family member showers or when you run your dishwasher or washing machine. Since tankless water heaters produce hot water on demand, you don’t have to schedule these daily tasks any more or worry you’ll run out of hot water when you need it most.

Water Heater

Unsecured water heaters often fall over, rupturing rigid water and gas connections. If your water heater does not have two straps that wrap completely around it and are screwed into the studs or masonry of the wall, then it is not properly braced. This illustration shows one method of bracing a water heater

Fresh water after a disaster may be as close as your water heater – provided, of course, that it remains standing upright. A typical water heater holds 30 to 50 gallons of water.However, this supply of water is extremely vulnerable to the ground undulation (swells and rolls) and ground acceleration of earthquakes, causing them to tip over.

Changes to strapping recommendations

Your tank may be strapped, but incorrectly, as old methods are no longer recommended. Experts have modified the recommended procedure for strapping water heaters because many tanks broke through their strapping

Experts recommend these two important changes:

Secure both the top and the bottom, rather than just the top or just the middle, of the hot water tank.

Use heavy-gauge metal strapping rather than plumber’s tape. Many water heaters in both the 1989 and the 1994 earthquakes broke through the plumber’s tape that was intended to keep them secure. The thin metal in plumber’s tape has been found to be too brittle to be effective.

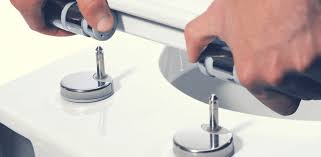
Secure your water heater.

There should be very little space between the water heater and the wall. If there is more than 1 or 2 inches, attach a wooden block to the wall studs with long lag screws (see illustration on page 20). The purpose is to prevent the heater from tipping backwards.

Wrap the heavy-gauge metal strapping 1½ times around the tank. Start by placing the strapping at the back of the tank. Bring it to the front and then take it back to the wall (see illustration below).

Secure this strapping to the wall studs or the wood block using several 1/4″ x 3″ or longer lag screws with oversized washers. If you are securing it directly into concrete, use 1/4″ expansion bolts in place of the screws.

Replace all copper and metal piping with flexible natural gas and water line connectors.

Hot Water Heaters

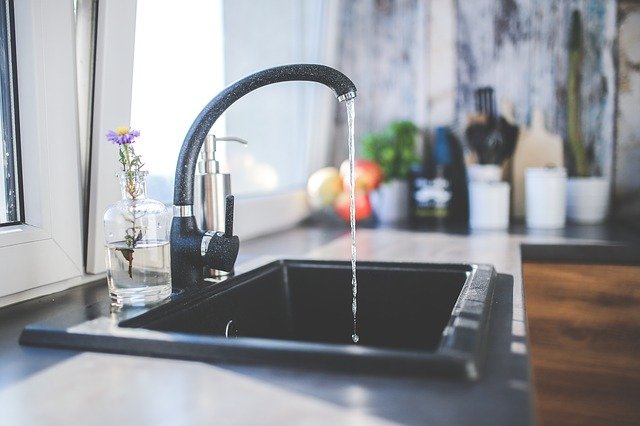
By default, tap water is neither hot nor cold. It depends on the temperature of the pipes. If it’s the winter, your water will be cold and hot if it’s the summer season. If you want to get hot water constantly, you need a water heater.

Hot water heaters are mechanically simple in terms of function. Cold water goes in, hot water comes out. This applies to the many types of water heaters in the market today. But what is it about water heaters that make them complicated? I can think of two things: the installation and the maintenance.

Knowing the kind of water heater that you have, and knowing the kind of water heater you want to purchase, can help you prolong the lifespan of your heater and also help you save money on repairs and installation. Listed below are the different kinds of water heaters available in the market today and some interesting tips on how you can go about with the installation and maintenance of your old or new hot water heater system.

Gas or Conventional Storage Water Heater

Gas water heaters are the most common type of water heater and are by far the oldest unit around. This water heater possesses an insulated storage tank used to hold quantities of heated water and can store anywhere between 30 and 80 gallons. Conventional water heaters are usually powered by whatever service is present in your home – like natural gas, liquid propane, oil, and even electricity. Inside the tank, you’ll find a gauge that reads the water temperature and when the temperature drops to a preset level, the unit will start up to bring the water temperature up. This is a continuous heating process that goes on for 24 hours a day, 7 days a week. It heats when you sleep or when you’re away on vacation. Gas water heaters actually force you to pay for heated water that you don’t even use but one good thing about gas or conventional water heaters is that there’s always hot water waiting for you.

Simple maintenance tips for gas water heaters

Draining and flushing should be done twice a year to prevent the build-up of sediment and minerals.

Check if your pressure relief valve is still working or in good condition.

Prior to doing any maintenance, be sure to turn off your heater’s power supply or set the gas switch to the pilot position.

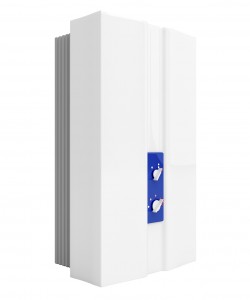
Tankless or Instantaneous Water Heaters

If you don’t want to be bothered with a huge tank in your home, then you can go for the tankless or instantaneous water heaters. These water heaters are often called “hot water on demand” because they only provide you with hot water when you ask for it, which makes it very practical due to the significant energy savings that you get out of it. You only get to pay for the hot water that you use. The only downside to these tankless water heaters is the low flow rate and its inability to accommodate simultaneous household use. If you’re using the hot water for showering, you can’t use hot water for taps or for the dishwasher at the same time. If this poses a problem, then you need to buy another tankless water heater for separate appliances. This is what most homeowners usually do. They have a designated water heater for the kitchen tap, dishwasher, bathroom tap, shower, and other plumbing appliances and fixtures. A conventional water heater can last for up to 15 years while a tankless water heater can function for 20 years or more but its longevity can come at a cost, literally. Tankless water heaters cost twice as much as conventional models.

The Importance Of Your Kitchen Sink

Ideas for the Space Behind a Kitchen Corner Sink

Corner sinks allow you to use a larger expanse of your countertop for preparing meals, but they also create dead space. The area behind a corner sink is often ignored, but it is usable. Instead of letting that space fade into the background, use it to stow handy kitchen items or to add a dash of interest to your kitchen decor.

Add Storage

The space behind your corner sink might be open, or it may have cabinets over top. Either way, you can add floating shelves or a small cabinet in this space to add more storage instead of wasting the space. A small shelf unit can be used to hold cleaning supplies, such as dish soap, sink stoppers and sponges. Another option is to install hooks or a towel bar to the wall and use the space to store cups or dish cloths and towels.

Accessorize for Style

The space behind your sink is often small and the angle of the corner makes it difficult to display useful items. Not everything in your kitchen has to have a use, however. Use this space instead to add decorative elements, such as kitschy knickknacks, a row of cookbooks, funky or artsy plates on decorative stands, or canning jars filled with colorful flowers or stones.

Use Plants for Texture and Color

Corner sinks leave the right amount of space for small container plants. Plants add texture and color to any space, but in your kitchen, go for plants that you can use, such as spices or herbs. Look for plants that prefer humid conditions, so they’ll thrive in the moist area of your sink. For example, lemongrass (Cymbopogon citratus) is an easy-to-grow herb that thrives in moist, humid environments and will liven up your empty corner space as long as a nearby window provides lots of light. Chives (Allium schoenoprasum) also thrive in the moist environment of your kitchen.

Spice Racks or Canisters

While the space behind a corner sink isn’t usually large enough for many items, it’s ideal for a small spice rack or a row of small canisters. Choose interesting shapes or bold colors to add a dash of style to your kitchen, and store spices you use every day or canisters full of sugar, coffee or treats for your family. Another option is to fill decorative bottles with hand soap or dish soap and fill the space with these.

Home for Small Appliances

Most homeowners have several small appliances they use daily, such as toasters, juicers, hand-mixers and coffee makers. These items are handier when they’re out and ready to use, but they often take up valuable prep space on your countertop. Use the space behind the corner sink to stow these items instead. They’ll be out of the way, but still accessible, and they dress up the empty space.

What Kind of Glue to Hold a Sink in a Vanity?

Installing a vanity requires a strong glue to hold the sink to the countertop. More importantly, the glue needs to keep water out to protect the countertop from rot and swelling. This means a waterproof, watertight substance with bonding power is the choice professionals make and the best solution for installing your counter.

Silicone Sink Caulking

Silicone caulking seals sinks to the countertop and prevents water intrusion. Today, a special type of silicone caulking compound is manufactured specifically for sink installation. This sink caulking material has water repellent properties and it bonds to ceramic and countertop laminate. It is the most commonly used glue to install a sink. This product is also called bathroom or tub and shower caulking. Either one seals and protects your counter from water.

Granite Sinks

Mounting a vanity sink to a granite bathroom counter top requires another type of glue, one that bonds to granite and the sink surface. Advanced adhesives specifically for granite counter tops are the choice here. Silicone caulking is still used on rimmed sink installations to seal out water. It acts as a protective barrier. The main focus in a rimmed vanity sink installation on granite is keeping water from dripping onto the cabinet below, anyway. Since granite is solid rock, water intruding into the counter is not an issue. The mounting clips secure the sink to the counter.

Undermount Sinks

An undermount vanity sink requires a very special adhesive. It must seal and bond very well while supporting the weight of the full sink. It is very important to seal the sink properly to the counter top, because if the supports weaken and the sink separates from the counter, water will leak into your cabinets. It also jeopardizes the stability of the sink and if it drops this has potentially disastrous effects on the plumbing beneath it. For this reason, only use manufacturer-recommended undermount sink adhesives and sealants designed for your counter surface and sink material, on any installation. Anything else is not strong enough for this type of project.

Farmhouse Fabulous: All About Apron Sinks

All this is fine, and helps to give these sinks their unique look. But it also means that if, for whatever reason, you tire of your farmhouse sink, you can only ever replace it with another farmhouse-style sink, unless you want to buy a new countertop entirely, which is a pretty expensive proposition.

Apron front sinks also require a unique kind of sink cabinet. If you take a look at your average sink cabinet, you’ll notice that it has doors below, and above the doors, in front of the sink, what looks like a drawer (to blend in with the rest of the kitchen cabinets) but isn’t. In order to accommodate a farmhouse sink, you’ll either need to buy a sink cabinet that is designed specifically for one, or have your contractor (or yourself) cut through that fake drawer bit at the top to accommodate the apron front. It’s not a big loss in terms of storage, but it does mean that your sink cabinet is now unsuitable for any other kind of sink.

It Will Get Stained (And Potentially Chipped)

If you opt for a classic white porcelain farmhouse sink, it’s very likely to get stained, and it will require regular cleaning to keep it sparkling. Scrubbing the sink with baking soda will help remove sauce stains, yet this mild abrasive won’t scratch the surface. If you don’t want to commit to cleaning your sink often, you may want to consider getting a farmhouse-style sink in another material besides porcelain, such as stainless steel.

If you cook often with cast iron pans or other heavy cookware, there’s also a chance you could chip a porcelain sink. Being careful when washing the dishes and investing in a protective sink mat will help avoid chips.

How to Troubleshoot Low Hot Water Pressure on a Single Handle Kitchen Faucet

An insufficient flow of water is usually the result of a blockage, and to remove it, you first have to locate it. A common cause of blockages in kitchen faucets is a build-up of mineral deposits, which can collect in the supply hose, the shutoff valve under the sink or the faucet valve. Single-handle faucets can have either a cartridge or ball valve, and both types of valves have ports that can get blocked. A good strategy for diagnosing low hot water flow is to begin looking for problems at the water heater and work toward the faucet valve.

Make sure that the hot water outlet valve on the water heater is open all the way by turning it counterclockwise as far as it will go. Check the hot water flow in other faucets in the house. If they also have low flow, and the water heater valve is open, there may be a restriction in the pipes near the water heater. This is more likely if the pipes are galvanized steel and old. The solution is to replace the pipes.

Open the shutoff valve under the sink all the way, and see if that makes a difference to the faucet flow. If the valve is already open, turn it off and disconnect the faucet supply hose from the faucet with adjustable pliers. Point the hose into the bucket and turn on the valve. If the flow is less than you expect, you probably need to replace the valve or the hose.

Service the faucet if you can’t find any other reason for the low flow. Start by turning off both shutoff valves under the sink and opening the faucet to relieve water pressure.

Remove the faucet handle with a Phillips screwdriver or Allen wrench, depending on how it is attached, and take out the valve. If it’s a cartridge faucet, you may have to pull a pin with needle-nose pliers or unscrew a retaining nut with adjustable pliers to get the valve out. If it’s a ball-valve faucet, unscrew the collar holding the valve with adjustable pilers, and carefully lift the valve off.

Insert a length of bare 12-gauge electrical wire into the hot water inlet port in the valve seat to dislodge any deposits that may have accumulated there. Flush the inlet by turning on the hot water shutoff valve for a few seconds.

Inspect the valve. If you see mineral deposits around the base, you may be able to chip them off with a flathead screwdriver. If not, try dissolving them by soaking the valve overnight in white vinegar. Replace the valve if you can’t clean it.

Reassemble the faucet after cleaning the valve seat and cleaning or replacing the valve. Turn on the shutoff valves, and flush air and loose debris out of the lines by leaving the faucet open for about 30 seconds.

Simple Guidance For Easy Toilet Installation

Learning the Basics of Toilet Installation

Remove the Lid and Drain the Tank

Shut off the water supply to the toilet by firmly closing the supply valve. Remove the tank lid, and flush the toilet, holding the lever down to let as much water drain from the tank as possible. Use a sponge to soak up the excess water in the tank and a plunger to force as much water as possible out of the bowl.

Remove the Caps and Nuts

Pop the caps from the base of the bowl. Remove the nuts with an open-ended wrench. You may need to hold the bolt still with a pair of needle-nose pliers. If the nut is rusted to the bolt, you may have to break it off.

Remove the Toilet

Disconnect the toilet supply tube from the toilet stop. Shift the toilet back and forth while lifting it off the flange. If you’re working alone, remove the tank by unbolting it from the bowl before you attempt lifting the toilet from the flange.

To prevent sewer gases from entering your bathroom, stuff a rag into the drain opening. Scrape all the old wax from the flange, and check for cracks. If the flange is cracked, replace it. Be sure to wear gloves when scraping off the old wax.

Install New Bolts and Wax Seal

Place the new toilet bolts in the flange with the bolts pointing up. Remove the rag from the toilet drain, and place a wax seal on the flange. Squeeze enough wax onto the bolts to hold them upright. Use a deep-seat wax seal when replacing older water toilets.

Attach the Tank to the Bowl

Set the tank seal in place. Place the tank on the bowl. Drop the tank bolts through the appropriate holes. Tighten the bolts until the tank doesn’t wobble. Be sure not to over tighten the bolts: you could crack the porcelain. If you’re working alone, attach the bowl to the floor before installing the tank.

Install the New Water Closet

Slowly set the tank and bowl assembly onto the wax seal, lining up the bolts with the mounting holes in the bowl. Tighten the nuts onto the bowl until the assembly doesn’t wobble. Reconnect the toilet supply tube to the tank. Refill the tank, adjust the water level, and check for leaks. Attach the seat using the seat bolts provided.

How Often Should I Replace My Plumbing Fixtures?

Toilets (like the actual toilet bowls themselves) really only need to be replaced if they’re cracked, though different parts within the toilet may need replaced more frequently. For example:

  • Handle: there is no distinct time frame, but you should replace your toilet handle if:
    • You have to jiggle it to stop the water from running
    • Your toilet won’t fully flush unless you hold the handle down
    • Your water runs on its own without you having flushed
  • Flappers, trip levers, fill valves, fittings, and plumbing connections: 4-5 years
  • Wax seals: 20-30 years

Toilets should be caulked at the floor

As standard procedure for every home inspection that I perform, I check the toilets to make sure they’re properly anchored to the floor. Almost every time I find a toilet that’s loose, I also find missing caulk at the base of the toilet. The two go hand-in-hand.

When I find a loose toilet I tell my client to properly secure the toilet to the floor and to caulk around the base of the toilet, but I frequently get clients that tell me they’ve heard otherwise.

The thought process behind not caulking a toilet to the floor is that if the toilet leaks at the floor, you’ll quickly find out about the leak as long as the toilet isn’t caulked. If it is caulked, the thinking is that if the toilet flange leaks, you’ll end up trapping water between the toilet base and the floor in an area that you can’t access.

In reality, toilets rarely leak onto the floor. More often, they leak through the floor around the flange. I’ve found plenty of toilets that leak down into the basement, but very few that leak onto the bathroom floor.

If the Toilet Won’t Stop Rockin’

If tightening the flange bolts or shimming the toilet base doesn’t stop your toilet from rocking, there might be more significant problems down below. The flange bolts that secure the toilet base are themselves held by a metal or plastic ring at the top of the toilet flange. The ring can corrode or break, loosening its grip on the bolts.

If your rocking comes back after ​a while, or if the bolts loosen up and won’t retighten, a damaged flange is likely the cause. The solution is to remove the toilet and either replace the old flange or repair it with a flange repair kit.

Top Toilet Tip:

Instead of standing by feeling helpless as a clogged toilet threatens to overflow, take action: Quickly remove the tank lid, reach into the tank and close the flapper—the round, rubber trap door that seals over the big hole in the bottom center of the tank. This will stop the flow of water into the bowl. Alternatively, you can close the shut-off valve to the water supply line. It’s on the wall behind the toilet, near the handle side and several inches above the floor. It has a football-shaped handle that you want to turn to the right, just like a faucet. Be warned, however: Old valves can be stuck and corroded, and turning them may cause some leakage.

Choosing A Kitchen Sink To Fit Your Kitchen

How to Choose a Kitchen Sink, According to Science

This includes the type, size, number of bowls, material, faucet fitting, and more. If you’re remodeling your kitchen from scratch, choosing a customized kitchen sink is more apt. Something that fits well with the ambience and color palette of the kitchen décor.

Choosing a new kitchen sink, as a homeowner, doesn’t have to be a price-based decision. You can easily narrow down your options based on the different styles and sizes of kitchen sinks. This guide will help you learn about the basics of kitchen sink and what makes it do functional and versatile in your home.

Looking At Different Sink Types

This is the simplest rundown for the common kitchen sinks types available on the market. You can opt for either on while modelling your kitchen or during renovating. Each kitchen sink type has its pros and cons, so it’s best to read through them all to find your most ideal fit.

How Many Sinks Would You Prefer?

The size of your kitchen sink also depends on the number of bowls it has. Based on how often you cook and make use of dishes can you determine the right number for you. The most common kitchen sink, in this regard, would be a large single bowl sink.

Considering The Right Sink Material

With attention to detail, comes selecting a durable and well-finished material for your kitchen sink. Here are some common sink materials to look forward to

How to Choose the Right Kitchen Sink

Our kitchens are constantly being used and the sink is the first thing that will get worn-out. Naturally, it’s easy to get overwhelmed by all the choices. Whether you’re remodeling or just getting a sink as a new homeowner, here’s how you can narrow down your choices from all the styles and types.

Under Mount

The key behind choosing the right kitchen sink is to evaluate your space and personal needs based on the three main types of sinks. An undermounted sink is installed below a countertop so that the sink drops down. The obvious advantage with this type of sink is that you can wipe a surface down straight into the sink. The under mounted sink is compatible with solid surface countertop materials like granite, soapstone, marble, or concrete with a wide array of durable sinks. Unfortunately, other materials such as laminate or tile counters are not stable enough to support the strength of the sink.

Top Mount or Drop In

Top Mount or Drop In sinks are installed in a hole in your countertop. There is no need for interior support. However, these kinds of sinks are usually very hard to clean.

Cost -Effective Materials

Every sink gets wear and tear, but some sinks get worn down more than others. Keep in mind that stainless steel sinks hold up better than enamel-coated cast iron sinks which often show scratches and signs of wear over time. Granite countertops work well with stainless steel sinks. Although stainless steel sinks can be noisy, homeowners can choose sound-absorption technology to reduce the amount of noise.

Number of Bowls

Knowing your space limitations will determine size and depth which in turn, will determine the number of bowls or basins. Traditionally, most kitchens feature a double-bowl sink, but a single bowl sink might be ideal for smaller kitchens giving a more functional look.

How To Choose The Kitchen Sink That’s Right For You

It’s important to always do some research before buying an item, whatever it may be. This is especially necessary when you buy something basic that you’ll be using for several years to come, like a kitchen sink for example. So where would you start from and how would you organize this major task? We suggest breaking it into subcategories based on the features that matter the most such as size, shape, the material from which the sink is made and the type of installation required. After you’ve considered all the pros and cons and you’ve made up your mind regarding these details, you’ll be better equipped to choose a kitchen sink that suits you and your home.

When it comes to size, there are two main options to choose from. You can either have a small kitchen sink or a large one. Each of these two types involves a series of subtypes so not all small sinks have the same dimensions and sometimes size is closely linked to other details such as the shape of the sink or the type of installation. In any case, you can usually know right away if your kitchen can accommodate a large sink or not or if you even need one. Be sure to also consider your lifestyle and the way in which you usually use your kitchen. If you have a dishwasher and you’re rarely using the sink for other tasks anyway, there’s really no point in wasting valuable space

Pick a shape: round sinks

Round sinks are really popular. They look chic and they’re pretty versatile as they can hold dishes, pots and pans of all sorts of different shapes and sizes. They’re usually not small but not very large either and they come in a variety of different materials with various types of finishes and in all sorts of colors. That means you have plenty of options to choose from once you also decide on the other details related to the sink’s design. Keep in mind that round sinks are also usually great for corners in case you’re considering such a placement.

Modern, rectangular sinks

Rectangular sinks with sleek, clean lines and minimalist designs are very common in all the contemporary kitchens and they’re usually embedded into the countertop. Compared to round sinks, they can be a bit more difficult to clean and less versatile but their biggest advantage is the modern look and you can’t argue with that, especially if you want the sink to be built into the kitchen island.

Farmhouse sinks

This style is very recognizable by the distinctive apron front and the vintage vibe that these sinks have. They’re rectangular in shape but they have curved edges which soften their look a little bit. Curved sinks are easier to clean than those with sharp lines and angles. Farmhouse sinks don’t come in many colors, finishes or materials so you’ll be limited to their signature look without the possibility to customize your kitchen decor too much (at least not as far as the sink is concerned).

How to choose your kitchen sink.

Choosing the right kitchen sink is one of the most important decisions you can make. Your kitchen sink will have a significant impact on your day to day life, and you want your sink to stand the test of time. Food preparation, cooking, washing and cutting are important tasks which can be very efficient – even enjoyable – when you have the right sink

When is the best time to select a sink?

The ideal time to choose a sink is before the start of any kitchen renovation – before layout design, counter or cabinet selection. If replacing an existing sink, there will be limitations based on the existing sink cutout and cabinet space on what can be selected.

MINIMUM CABINET SIZE:

You need to determine your kitchen cabinet size before you start shopping for your new sink.

Standard kitchen cabinets come in size increments of 3″ (for example: 18″, 21″, 24″ etc.)

All BLANCO sinks indicate the minimum cabinet size requirements.

COUNTERTOP DEPTH:

The size of the sink you choose, will be determined by whether or not your countertop has a backsplash.

LEFT: For laminate countertops with a backsplash, a sink that measures up to 20 ½“ (front to back) should fit

RIGHT: For laminate or stone countertops without a backsplash, a sink that measures up to 22“ should fit.

SILGRANIT: GRANITE COMPOSITE

Non-porous surface repels dirt and liquids. Offers exceptional resistance to scratches, heat and impact; ideal for heavy kitchen work.

Withstands up to 280°C (536°F) – exceeding common boiling and baking temperature levels. Endures extreme temperature fluctuations between hot and cold.

What to Know About Choosing the Right Size Kitchen Sink

Sink size is a personal choice. If you know your way around a kitchen, and especially if you’ve worked with different-sized sinks over the years, you probably know what you like. But if you’re starting out, we’re here to help.

Architect Jerome Buttrick of Buttrick Projects Architecture & Design, a member of the Remodelista Architect and Designer Directory, is based in Oakland, California, and has plenty of experience (he’s been practicing for more than 25 years and worked on not one but four renovations with Remodelista founder and editor Julie Carlson). And, for an appliance perspective, we also checked in with Reece Williams, who’s handled sales for 20 years at Cherin’s Appliance in San Francisco, in business since 1892

Is there a standard sink size for the kitchen?

Both Buttrick and Williams say they’re seeing many more single-bowl sinks installed than double-bowl. According to Williams of Cherin’s Appliances, customers typically choose a single-bowl dimension of about 28 to 30 inches long, and “they’re quite happy with that—it gives them enough room to do two things in the sink at once.”

How do I know what size sink I need?

A commercially made single-bowl sink can be as long as 33 inches, while a double-bowl model can reach 48 inches. Either of those takes up a lot of kitchen real estate, so your decision may well be based on how much counter space you can spare. Budget might also help you choose—but in any remodel, sink cost is far from the biggest slice.

What are the pros and cons of a deeper sink?

A number of sinks on the market are two to three inches deeper than the usual eight inches. Depending on the sink’s width and length, the extra depth can make it easier to wash oversize pots—which is especially useful for anyone cooking for a big family or a large numbers of guests. (Think of that roasting pan for the holiday turkey.) Another plus: If your sink is visible from the dining table, it’s easier to hide the dirty pots and dishes.