Increasing The Value Of Your Home With Carpet Flooring

How Often Should Carpets be Steam Cleaned?

Carpets are a popular floor covering due to the noise insulation and the warmth they provide in the home, not to mention a soft landing for toddlers learning to walk. But just like other floor surfaces they get dirty and need to be cleaned. The trouble is that dirt and dust that can easily be seen on the hard floor surface is hidden within the carpet fibres, so it looks cleaner, meaning the carpet may not get cleaned as often as it should.

Steam cleaning

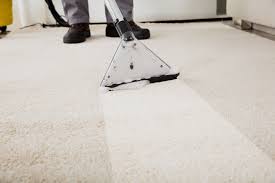
Having a professional steam clean the carpet is the best way to get it properly clean as the steam penetrates all the carpet fibres and lifts the dirt out of them. Any moisture left behind is sucked up by the cleaning equipment so the carpet ends up being much cleaner and it can dry out quickly. Most experts recommend this be done on an annual basis, but much depends on your lifestyle and climate.

Under certain conditions the carpet will get dirty much more quickly and so will need professional carpet cleaning more often – even 3-6 monthly is not too much. The carpet should be cleaned more frequently if

  • The people who live in your home suffer from allergies
  • You have children and inside pets
  • You live in a dusty or windy climate
  • Mud gets tracked in regularly
  • The house is surrounded by plants that have a lot of pollen, such as wattle trees.
  • The house is in a high smog area
  • There are smokers in the house
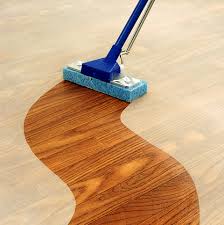
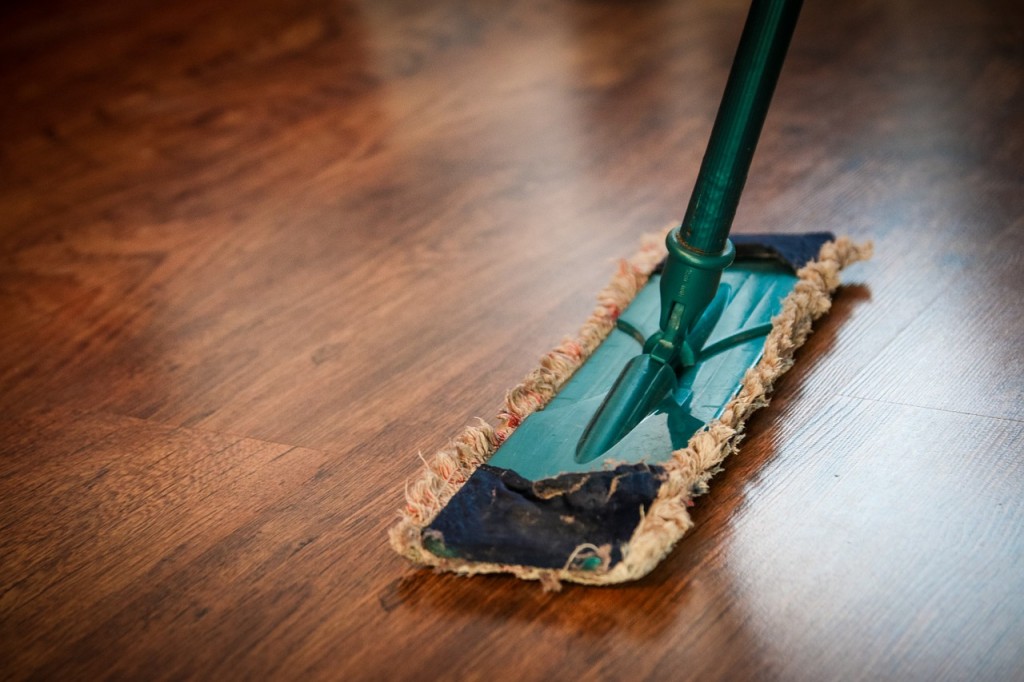
Vacuuming

In between professional cleaning, you need to vacuum the carpet and other floor surfaces on a regular basis, depending on how much foot traffic there is. Weekly or twice weekly for heavy traffic and fortnightly for light traffic, such as where no one is home all day and there are no pets. To vacuum a carpet properly you need to go over it slowly to allow the suction time to lift dirt and dust out from the fibres, unlike a hard floor that can be swished over quickly.

Spills

If there is a spill on the carpet it should be attended to immediately, blotting up the moisture with paper towels, then dab with a moist towel to remove staining. If the carpet gets too wet, leave a stack of paper towels pressed down with something heavy on it overnight.

Mud

The only stain that should not be attended to immediately is mud. If mud is tracked onto the carpet, it is better to leave it until dry, then scrape and vacuum it off. When most of it has been removed, dampen a towel with a mild solution of detergent to dab at the stain that is left.

How Often Should You Clean Your Carpets With Pets?

Pets shed hair and dander, and when they go in and out of the house they bring in all kinds of dirt and gunk from outside. 

If you’ve got pet traffic, you should steam clean your carpets every 4-6 weeks. We recommend that you invest in your own steam cleaner so that you have easy access to it every month. Plus, with most commercial steam clean rentals at $30/day, even a top of the line steamer will pay for itself after 10 months.

Between steam treatments, it’s important to vacuum every day. Though this may sound excessive, it’s necessary. Daily vacuuming keeps you and your family safe from the bacteria that pets bring in that can fester in carpets. For those with pets, these are the best vacuums to purchase.

If you find that your carpet has an odor to it from pet accidents, try the baking soda method to get rid of the smell. All you have to do is apply baking soda to any smelly spots on the carpet, let it sit for 24 hours, and vacuum up the residue.

Best Practices for Keeping Your Carpet Looking Nice Between Cleanings

1. Vacuuming

Regular vacuuming is one of the most effective (and cost-effective) ways of removing dirt from your carpeting. Be sure that you are using the right vacuum and going slowly over the carpet in both forward/backward and side to side directions. Areas like general offices areas or corridors should ideally be vacuumed daily, or at least 3-4 times a week. Lower traffic areas like conference rooms and executive offices can usually be done once a week.

2. Spot Cleaning

The sooner you can treat a stain spot, the better your chances of successfully removing it. It is a good idea to have someone regularly check your carpeting for any stains to spot clean them. You can also have this done as part of a carpet preventative maintenance program.

3. Preventative Cleaning

The best method to keep your carpet looking good and lasting long is to have them professionally cleaned at regular intervals (which may differ for different areas based on the state of the carpet, usage and traffic). For heavy traffic areas like entrances and halls, you want preventative cleanings 1-2 times per month. For medium traffic areas like administrative offices, every 2-3 months is typically sufficient. For lighter traffic areas like conference rooms, every six months is recommended.

How often should you have preventative cleaning done?

  • For heavy traffic areas like entrances and ground floor halls, you want preventative cleanings 12-24 times a year. The more the better, but at least once a month.
  • For medium traffic areas like administrative offices or above ground halls, 4 times a year (quarterly) is the ideal frequency.
  • For lighter traffic areas like boardrooms and conference rooms, twice a year should do the trick.

Don’t Believe This Common Carpet Cleaning Myth

There’s a popular myth that cleaning commercial carpet too frequently will shorten the life of the carpet or make its appearance worse. This leads some managers not to clean carpet at all or wait until the carpet is severely soiled.

This myth actually has a bit of truth to it because extraction cleaning done improperly can lead to a dirtier carpet—especially where detergent residue is left behind. Residue is a soil magnet. Carpets with residue will begin to look dirty again within a matter of days in high traffic, ground floor areas.

But beyond that specific situation, the “less cleaning is better for your carpet” myth is just that—a myth. In actuality, the more you clean your carpet (as long as it’s done properly) the better it will look and the longer it will last.

Obviously, cost also plays a factor. The more you have your carpet cleaned, the more dollars you need to devote to your carpet-cleaning budget. So what’s the best approach? How should you clean your carpet, and how often, to keep it looking good and give it the longest possible lifespan?

Hardwood Flooring Refinishing

The Top Surface Finishes for Hardwood Flooring

Hardwood flooring is available with a number of distinct surface finishes that not only enhance the wood grain, but also help protect the floor. Whether you’re looking for a shiny, high-gloss finish or something a little more matte, hardwood top coatings provide plenty of options. Below are some of the top surface finishes for hardwood to note when choosing etiher solid or engineered hardwood flooring for your home.

Surface Finishes for Hardwood: The Options

Water-Based Polyurethane

Arguably the most popular surface finish for hardwood flooring, water-based polyurethane provides a clear finish and has the traditional hardwood look and feel. Traditionally, this smooth, lustrous finish gives solid and engineered hardwood floors the signature wet look, achieved by using multiple coats of high-gloss polyurethane. However, water-based polyurethane finishes also come in satin and semigloss.

Most high-gloss polyurethane hardwood flooring is prefinished in the factory. This makes installation much faster. Thanks to the high sheen, cleaning this hardwood finish is easy, although scratches, pet hair, and other imperfections do tend to stand out. Oil-based polyurethane is another urethane option, although it can yellow over time.

Oil Sealer

Oil sealer or penetrating oil sealer is a wise choice if you’re planning on finishing your hardwood floors yourself. It’s pretty straightforward for DIYers to apply. It doesn’t dry as hard as the polyurethane mentioned above, but the penetrating process brings out grain patterns and enhances the color of the wood. This finish also allows for touch ups later on.

The main benefit of oil sealer is the low-gloss, natural look it brings to flooring. It is ideal for antique and traditional style homes. The main ingredient in most oil sealers is tung oil. Tung oil is naturally derived and not permanent. You will need to reapply oil sealers every three to five years. This type of finish also has a longer drying time (24 to 48 hours per coat) and requires several coats.

Hard-Wax Oil

If you’re looking for a natural finish that’s easy to apply, hard-waxoil offers a warm look. It also provides excellent protection. Although wax treatments for hardwood may be considered outdated by some, they’re growing in popularity again. It’s perfect for those who want a low luster finish that’s easy to touch up.

Most hard-wax oil finishes for hardwood are DIY-friendly in terms of application. Due to the finishes’ low durability and susceptibility to staining, reapplying the wax finish is an ongoing process. This is generally recommended to be repeated every two to three years.

Acid Cured

Also called a Swedish finish, acid-cured finishes are extremely durable — more so than polyurethane. This type of finish is ideal for smooth-textured flooring and exotic woods that need extra protection. However, acid-cured finishes have high toxicity levels during the curing process. This toxicity can last anywhere from three days to an entire month, depending on the relative humidity.

Aluminum Oxide

The king of durable finishes is aluminum oxide, which lasts up to 25 years. This is especially beneficial for engineered hardwood floors because they often have a thinner veneer that doesn’t lend itself to sanding and refinishing.

Prefinished planks are your only option if you choose hardwood with an aluminum oxide finish. This limitation is due to the application and drying equipment used in the finishing process. This makes installation faster than traditional on-site sanding and finishing.

Two Options for Refinishing

Does your floor need a touch-up or an overhaul?

  • Touch-up. For surface scratches and normal wear and tear, lightly sand the finish (called screening) and apply a new topcoat. You’ll want to use the same type of finish product that was on your flooring originally.
  • Overhaul. For more damaged flooring, you’ll want to completely sand the old finish off down to the bare wood. Once you’ve done that, you can apply any finish.

Selecting a hardwood flooring finish

How to decide? Think about how the room will be used and exactly how you want the hardwood floors to look after the finish has been applied.

Most of the available options also give you a choice of sheen. The higher the gloss finish, the more noticeable scratch marks and scuffing will be. A smooth or matte finish will reflect less light and is much more practical. A less glossy finish or a satin sheen will give your hardwood floor a more traditional appearance.

Your final flooring finish decision should be based on:

• How durable the finish needs to be.

• Whether the floor needs special moisture protection.

• Exactly how you want the hardwood floor to be treated.

What is the hardest wood floor finish?

The hardest wood floor finish is aluminum oxide, but it only comes on prefinished boards. If you want something durable you can add after installation, acid-cured is your best bet.

Do you need to seal hardwood floors?

You have to seal unfinished hardwood floors to protect them from scratches and stains. The frequency depends on the type. For example, polyurethane products usually need refinishing every 3 to 5 years.

What’s the difference between wood stain and finish?

Wood stain adds a color to the surface. A finish adds a level of shine (e.g. matte, low-gloss, high-gloss) and seals the grain to protect against damage.

Designed To Provide Hardwood Flooring Stability

How to keep your hardwood floors looking fantastic

New hardwood floors — or restored old ones — can be a beautiful addition to your home. But they’re also a huge investment.

You can make that investment last longer with some simple care tips. Here’s how to keep your hardwood floors looking great, long after the installation or renovation.

Start with a clean sweep

You need to sweep hardwood once a day, but your typical broom isn’t going to cut it. Invest in a dust mop such as the O-Cedar Dual-Action Microfiber Sweeper (which is what I use) or something similar. These mops have wide heads that trap dust without making micro scratches in the floor’s finish.

Be sure to push the mop in one direction and swivel to turn. Don’t lift the head of the mop off the floor until you’re done. If you lift the mop prematurely, dust and lint will be released into the air and you’ll need to re-mop the area you just finished.  I learned this trick when I was a school janitor cleaning gymnasium floors way back in the day.

When you’re done, there will be a line of gunk where your mop stopped. Use a small microfiber brush and dustpan to gather it up.  Then place the end of the mop into a garbage sack. Close the opening of the sack around the handle with your hand and give the mop a good shake to release trapped dust and debris.

Keep it dry

This may be counter to what you’ve learned about housekeeping, but don’t use wet mops or steam mops on your wood floors. The moisture can damage the finish and may even harm the wood after a while, according to the National Wood Flooring Association. Instead, use a cleaner that’s made for wood floors. Many of these products are formulated to work with the type of finish you have on your floors, so make sure you read the labels before you make a purchase. Carefully follow the directions on the bottle when you clean. It’s usually recommended that you clean your floors only once a month with cleanser.

Beyond cleaning

Cleaning your hardwood floors properly isn’t the only thing that will keep them nice. You also need to take some preventative measures. Clean up spills or any other moisture right away to avoid damage to the wood. A damp cotton or microfiber cloth is ideal for spot cleaning. Consider applying a UV coating on your home’s windows. UV rays can bleach the hardwood over time, leaving discolored spots on areas that get the most sunlight.

Finally: Pointy things are bad. Don’t sashay across the floor in high heel shoes, for example. The pointy heel can leave divots in the wood. Furniture legs can also leave imprints and scratches, so be sure to put felt floor protectors on the bottom of each leg.  

Is Steam Cleaning Safe for Your Hardwood?

Despite what the appliance companies would have you believe, you should never use a steam mop on a hardwood floor. The pictures on the company websites and boxes of these gadgets often feature a person cleaning and happily ruining their hardwood floors with this expensive appliance.

The intense heat drives the moisture deep into the wood and causes irreparable damage. After just a one or two cleanings with a steam mop, planks can shrink or swell, buckle, splinter, delaminate, and look aged well beyond their years.

You can potentially use a steam mop on hardwood if you’re confident your floors have been sealed, and that the hardwood seal is still in-tact. To test this, drip a small amount of water on your floor. If it beads up right away, the seal is likely still intact and. If the water seeps into your wood or runs without beading, your floors need to be resealed.

Things To Think About

High quality microfiber mop pads will make cleaning your floor easy, but not everyone that looks the same, cleans the same. If you get one that has pads made from superior material, it will take you less time to do the job, and you will use less energy. As an added benefit, you will also polish the wood as you remove dirt. Because you are not introducing a bunch of moisture, you never run any risk of damage, and based upon the super gentle material, you will never mark or scratch the surface either.

The broom you choose is also important. With such a wide variety out there, usefulness certainly varies, but so does safeness. If you use a low quality tool to sweep your wood floors, then you can scratch them up or ruin the finish, and that is on top of getting frustrated over removing the dirt. We always suggest a rubber broom for hardwood because they are gentle on the surface, but they also remove dirt with amazing efficiency. Other models may work as well, but these have proven to outperform most other options. The rubber bristles form a solid wall to sweep up debris in a single pass, and a slight charge that builds prevents annoying stuff like fur balls and dust that flies away. With a little bit of preventative maintenance and some common sense, you will be able to keep your hardwood floor looking fabulous for many years. There are only a few simple steps and rules to follow when dealing with hardwood flooring because it is actually one of the easiest flooring types to care for.

Hardwood Flooring Maintenance

KEEPING YOUR HARDWOOD FLOORS LOOKING NEW

Hardwood floors are an elegant addition to any home, but they need a little TLC to keep them looking fantastic. Rather than just hoping for the best, you can learn all about hardwood flooring care and ensure that you treat those beautiful planks right. Here are a few tips and tricks that are easy to follow and sure to work.

PROTECTION FROM FEET

While you may worry about people walking over the floor in hard-soled shoes, the bigger concern is actually the feet on your furniture. If you can arrange the furniture so that it sits on area rugs, that’s the ideal solution. Any furniture legs that are directly on the hardwood will be prone to sliding, and that will lead to localized scratching. Put felt pads on the bottoms of all legs to protect the floor. They come in a range of sizes, and they have stick-on backs for easy application. Replace them as they wear down.

INVEST IN THE RIGHT CLEANERS

As you learn how to care for your hardwood floor, you’ll discover that there are countless products to choose from. The trick is actually to base it on what’s in your house. Older floors that have worn finishes may benefit from lemon oil to nourish the wood and keep it moisturized. New floors that have been finished at the factory should be cleaned using specialized products like Bruce Hardwood Floor Cleaner.

NEVER USE RUBBER

This is one of those hard and fast rules of hardwood flooring care that you’ll want to embrace. You can buy rubber mats to go under area rugs, but you’ll damage the floor by doing so. The rubber chokes the wood, prevents it from breathing and leads to discoloration. Use heavy furniture on a few edges of the rug to keep it in place, and try to reposition the carpet regularly.

Learning how to care for your hardwood floor isn’t as hard as you might think. Use place mats at the doors to capture dirt before it can be tracked on the floor, and encourage your family to take their shoes off before moving around the house. By following these rules and the ones listed above, you’ll be able to keep those beautiful wood floors looking amazing.

Things That Should Never, Ever Touch A Hardwood Floor:

Wet mops: The #1 source of damage to finishes – Although people might think that sloshing a soaking wet mop back and forth over their floors is a good idea, this will actually ruin the finish and damage the wood itself. A mop that is used to clean hardwood floors should only be slightly damp.

Vinegar is good for cleaning many things, but not hardwood floors – White vinegar was once a popular product used to clean hardwood floors. And a quick Google search reveals that a lot of people still recommend using it. But vinegar should not be used as a hardwood floor cleaner because its acidity can lead to etching in the wood’s surface.

Don’t use ammonia to clean hardwood floors

Avoid ammonia – Ammonia will discolor, deteriorate, and dull the finish. Using ammonia to clean a wood floor will take years off of its life.

Steam cleaners are bad news – You should only use steam cleaners on carpets and other surfaces that they are designed for. Using a steam cleaner on a hardwood floor can cause peeling, cracking, and cloudiness in the finish.

Popular cleaning products – Most of the cleaning products sold in grocery stores aren’t friendly to wood. They’ll damage the finish if used over a long period of time. Pair one of these products with a soaking wet mop and you’ve got a recipe for disaster.

Helpful Tips On Hardwood Flooring

What Is Engineered Wooden Flooring?

Engineered flooring consists of a top layer of solid wood — the veneer. This ranges in thickness depending on the quality of the flooring, but is typically between 3-7mm, although thicknesses of up to 15mm are available. Underneath the veneer are several more layers of thin wood, all glued together to form a plywood-like sandwich base. These layers run at 90° to one another for stability, making them less prone to movement, caused by humidity, than solid boards.

8 Must Know Things You Need To Know When Buying Hardwood Flooring!

If you are someone who is looking to buy hardwood flooring, do not rush! This article will give you a list of things that you have to know about such floors before buying them so that you are not stuck with something that you don’t want or something that you pay for but accidentally end up ruining.

  1. Acclimation- it is necessary for the hardwood to be acclimatised to its surroundings properly to be able to last long without damage. One of the main things you should keep in mind here is the moisture content of the wood as well as the sub-floor which should not differ from each other by more that 2-4%. Before you install the wood into the sub-floor, you also have to make sure that it reaches room temperature 24 hours before the installation process. Make sure to follow the instructions given carefully with regard to acclimatisation.
  2. Moisture content- while each type of wood and each manufacturer will have a different figure for the ideal moisture content of the hardwood, there is a universal average of 6-9% that is considered good. If there is a huge difference in moisture levels between the wood and the sub-floor, you could face sudden expansion or contraction. To avoid this, make sure to use an electronic moisture metre to measure moisture content
  3. Climate control- it is necessary for the climate to be maintained constantly throughout the installation process for it to happen smoothly. There are different tactics which you can employ if you want to maintain the temperature in the room and all of this can be found on the internet
  4. Floating floors- when you install a floating floor, keep in mind that as with regular wood, this will also expand and contract with temperature changes and you should therefore leave enough space between the floors and walls to allow this to happen
  5. Expansion joint- these are an absolute necessity when two rooms converge at a point. The most common type of molding used is the T type to allow for the expansion and contraction
  6. Moisture control- with all the emphasis on moisture content, it is obvious that the amount of moisture in the sub-floor has to be controlled. The upper limit for relative humidity in the sub-floor is 65% and anything higher than this can be detrimental. For moisture, your sub-floor must not exceed 12% and if it does, you cannot use hardwood for your flooring
  7. Glue down flooring- while it may seem logical to simply glue down the hardwood to the sub-floor, you may want to avoid this as it becomes problematic when you want to pull it out and replace it. Alternately, you can glue the pieces of hardwood to each other or install it on the sub-floor using tongues and grooves
  8. Nail down flooring- for this, make sure that you carefully read the instructions that come with and even call in the help of professionals if you need to because fixing it improperly can cause permanent, irreversible damage

5 Reasons to Choose Pre-Finished Versus On-Site Finishing

Here’s 5 advantages of pre-finished white oak flooring:

  1. Prefinished boards expand or shrink individually, leaving the floor smooth. Site finished floors can stick together with the overlapping finish. This is called “side-bonding” and can create unsightly gaps as the floor naturally moves with the changes in temperature and humidity.
  2. You don’t have to move your family out of the house while the floor is drying.
  3. You don’t have dust from sanding and there are no odors or hazardous fumes from stains and sealers.
  4. Less installation time.
  5. You’re ready to walk on prefinished floors the moment the last board is down. No drying or curing time needed.

Do’s and Don’ts of Flooring

So many flooring choices, so little time to research which looks good, feels good, and lasts.

No worries. We’ve sorted it out for you with a handy do’s and don’ts list.

Style

DO: Consider your home’s layout. Got an open floor plan? Using the same flooring throughout the space will create a clean, continuous appearance. 

DON’T: Forget about your home’s architectural integrity. By all means, make your home a reflection of your personal style. (Get inspired by these super-cool floor ideas.) Just keep in mind that staying true to your home’s innate style will pay off when it’s time to sell. 
 
Tip: Hardwood floors are the goof-proof option.

  • Hardwood is a win-win when it comes to architectural style. It’s equally at home in both classic and contemporary abodes. You and your eventual buyers will never regret the choice.
  • It’s practical and beautiful; hardwood is strong enough for kitchen duty, but adds a homey and classic touch.

Durability

DO: Keep your local climate in mind. Damp and humid weather can shorten a floor’s lifespan. For instance, hardwood can warp.

DON’T: Underestimate wear and tear depending on where you’re planning to install new flooring. Drop a glass jar on ceramic tile and it’ll chip; heavy foot traffic will beat up pretty plush carpeting.

Tip: Properly sealed, concrete floors are a tough and good-looking choice.

  • Concrete resists water, stains, smells, and scratches. It also won’t harbor mold or mildew.
  • It can take a pounding, so no worries there about daily wear and tear.
  • It packs an energy-saving benefit since concrete floors can retain your home’s heating and cooling.
  • The icing on the cake? It can be painted to look like wood or tile.

Comfort And Air Quality

DO: Consider comfortable flooring materials, especially in rooms where you spend a lot of time standing, such as the kitchen, and if you have small children or plan to age in place.

DON’T: Contribute to household air pollution. Both traditional vinyl flooring and newly installed carpets can emit high levels of VOCs for up to 72 hours.

Tip: Cork hits the comfort and environmental-friendly trifecta.

  • It’s a treat for feet (think kitchens) and can soften the blow when little ones fall (think basements, family rooms, kids’ rooms) thanks to microscopic air pockets that give the material its cushiness.
  • Cork is great for indoor health. It won’t hold on to dust and pollen and resists nasties like bacteria and fungi. When it comes to VOCs, go with low- or no-formaldehyde content and avoid cork-vinyl composites. How do you do that? Look for cork flooring products that are either Floorscore or Greenguard certified, or that qualify for a LEED point for low-emitting materials. Also, if you’re using a sealer or an adhesive select a low- or no-VOC product.
  • It’s sustainably harvested. Cork flooring is made from cork oak bark. Since the bark grows back, the tree is left standing.

Life Of The Floor

How long until, realistically, you have to redo this kind of floor? There have been studies done that found the lifespan of this particular kind of floor can be between 40 and 80 years. That is a really, really long time to get out of a floor; are you going to own your home for, at the least, 40 years? Probably not. So the life of this floor is going to last, at least, for the time you own your home and well into the span of the next owner’s time there. Outside of solid hardwood floor, you are very unlikely to find this kind of lifespan from any other flooring type out there.

Scratches, Dents And Other Small Marks

Due to the fact that engineered flooring has a top layer of solid wood it is actually susceptible to the same drawbacks of having solid hardwood floors such as easily being scratched and dented. If you do not mind a few marks of character on your floor then it probably will not be a big deal, but if you want your floors to stay pristine then you may not feel like these floors are very durable. However it is important to keep in mind that if you are, at all, living on your floors you are probably going to notice a mark eventually on them. The benefit of engineered flooring is that you can fix it with a wax repair kit, or based on who the manufacturer is, refinish these floors once or twice.

Moisture

Perhaps one of the best things about engineered flooring is that it takes the best of solid hardwood and the best of laminate wood floor and combines it into this durable, robust product. Engineered flooring looks exactly like solid hardwood, but it can be installed in basements or other areas prone to moisture. Provided a proper subfloor with a moisture barrier is installed under the floor it is an incredibly durable flooring product. By ensuring these are installed under the floor, the floor itself can actually take a lot of moisture. This does not mean spill something on it and leave it indefinitely, but if you home tends to be humid the floor is probably not going to warp or bubble.

The Trials Of Tile Flooring Installation

Tips To Choose The Best Tile Floors For Every Room

Consider Tile Hardness

It measures the material’s ability to withstand wear/foot traffic, as well as scratches. The ratings are issued by the Porcelain Enamel Institute and are based on rigorous laboratory testing. You can use this scale to select a product that is most suitable for your room’s function.

Pay Attention To Tile Porosity

Another critical feature not to be missed is porosity. It is determined by the ratio of air holes to solids in a tile, which impacts the amount of water it absorbs. If you are installing tile in a moisture prone area, such as a bathroom, kitchen, mud room, laundry room, pay close attention to this rating.

Go For Porcelain Tiles – An All Around Win

If you are looking for a material that has strength, moisture resistance and versatile design, porcelain is the best choice. It is more durable than ceramic and comes in a greater variety of styles, colors and textures. Not all porcelain products are made equal, and you need to check the specs of each one.

Ensure Slip Resistance

Most tile materials tend to be slippery, and all the more so, if water is introduced into the equation. If you have children and elderly people in the house, it is very important to install slip resistant tile. The bathroom is a prime place where fall accidents may happen, particularly the shower area, so good slip resistance is highly recommended.

How to Choose the Right Floor Tile

Tile Trends

To kick off your selection process, you should first know the trends. Currently, large-format tile is leading the pack. This 12- by 24-inch tile is a stylish option for entryways, kitchens or bathrooms. On the other hand, small hex tile is a popular option for bathroom floors. This vintage option brings a classic look to any bathroom, but is too small for larger areas like a kitchen or entryway. Instead, another popular option for kitchens and entryways is plank tile that looks like wood. This option has been gaining steam for the last few years and remains a great way to get the look of hardwood with the durability of tile.

Tile Durability

Speaking of durability, this is the next thing you’ll want to address to help narrow down your choices. You should ask yourself, how much foot traffic will this tile get? After installing a brand-new tile floor, the last thing you want to find is a crack or chip. That’s why you want to make sure that if you’re putting tile in a high-traffic area like an entryway or kitchen that it’s durable enough to stand up to the challenge. To find out how durable the tile you’re looking at is, check out its PEI (Porcelain Enamel Institute) rating. If the tile has a PEI Class 1 rating, you should not consider it for the floor. A PEI Class 1 rating means the tile is not meant for any foot traffic. It should only be used for wall tile. Ratings of PEI Class 2-5 are acceptable for floor use. Class 2 is meant for light traffic, while Class 5 rated tile is the most durable, meant for heavy to extra-heavy traffic.

How to Choose Tile Flooring

There’s a reason why so many homeowners love tile floors, as it is one of the most versatile floor coverings on today’s market. The best part is, it’s as functional as it is aesthetically pleasing. Not sure how or where to begin your journey to a home lined with multidimensional tiles? Flooring America associates are highly trained and enjoy helping you find flooring tiles that complement your décor.

Finding the Ideal Tiles for Your Home

Our reputable flooring store offers an array of tiles to upgrade the elegance of your residential interiors. Product lines are available in an array of colors, patterns, and styles so you can customize the look of any room in your room. Floor tiles are a conversation piece on their own!

Ceramic vs. Porcelain Tile

We offer two types of tiles at Flooring America: ceramic and porcelain. Our associates are knowledgeable about every type we sell, ensuring that you know all your options. We carry the best name brands in the industry at prices that won’t break your budget. Here are the basic differences between the two materials.

The Complete Guide to Select the Right Tile for Your Project

Tile Durability

Most of your clients will probably worry about the appearance of the tile, which is understandable considering at least a partial goal of a new project is to revamp a home. But, what you must help them understand is that the primary factor to consider when choosing the tile is durability.

Location

The room where you are going to install the tile can help narrow down the options. The bathroom and kitchen require a waterproof material like ceramic or glass for the walls. However, you could also accommodate certain stone tiles to high-moisture areas.

Tile Size

Most tile models are available in a wide variety of sizes, so it shouldn’t be an issue to find something that will fit the particular project you’re working on at the moment. Measure the room carefully and keep its proportions in mind when picking a particular tile size.

How to Choose Tile Colors

Consider the size of room before choosing a color.

Floor tile colors in light hues, such as cream and pastels, can make a small room look larger. Light tile colors are good choices for a guest bathroom or narrow hallway. Dark floor tile colors, in rich chocolates, burnt sienna and variegated navy tones, look best in large areas like kitchens with an open floor plan and plenty of light.

Decide on a tile type.

Stain-resistant, glazed ceramic tiles work well on countertops or on bathroom and kitchen walls that are exposed to high humidity. Dense porcelain tile is scratch-resistant and works well for flooring.

Consult a color wheel for combinations.

Create a vibrant statement by choosing colors that are opposite on the color wheel. For example, in a room where you like to entertain, contrast a terra cotta tile with a rich blue wall color to give the room energy. In a room where you want to relax, choose colors that are next to each other on the color wheel. The tone-on-tone colors will create a more tranquil feeling.